Create New Proctor
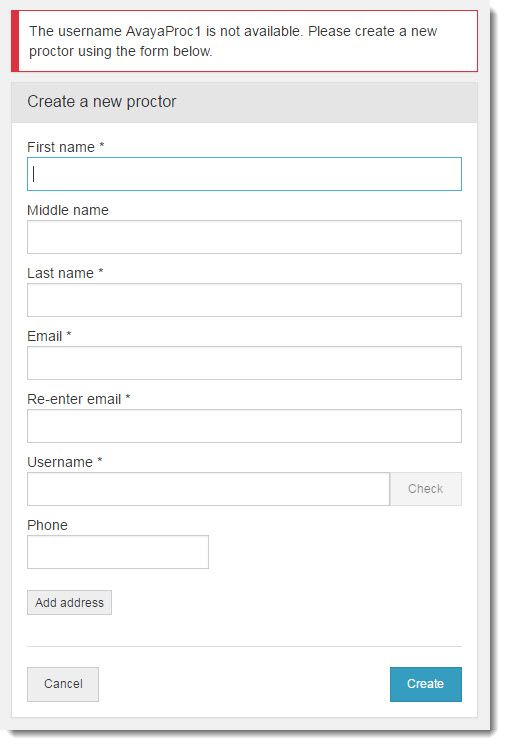
To administer Anywhere Proctored exams, a proctor account must be added to the Proctor Management system. The proctor account consists of the First name, Last name, Email, and Username. Any of the other fields are optional for the proctor account. Once the account has been created, a unique ID is assigned to the proctor account.
|
Note |
Only Proctor Management Client admin proctor users, User Management Client administrators, VUE Administrators, and VUE Super Users can create new proctor accounts. |
Create a new proctor user account
You may create a new proctor user account that is not currently a Navigator user. Creating a new proctor user account automatically creates the Navigator user account at the same time. The process for making an existing Navigator user a proctor is slightly different. See the Make an existing user a proctor topic below.
- Click the Create proctor button in the upper right-hand corner of the Search proctors page.
The Create a new proctor screen opens. 

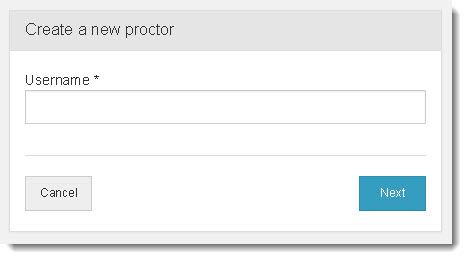
- Enter a Username for the Proctor and click Next.
|
Note |
The Username must adhere to the following characteristics:
As a best practice, you should come up with a naming practice that will ensure your usernames will not be a naming structure other clients may use. For instance, you could use email address as the Username since everyone will have a unique email address. Another possibility is first 4 letters of the user's last name + first 2 letters of the user's first name + company name (e.g., Dan Johnson at My Company would be johndamyco). |
- Enter the First name, and Last name for the new user.
Middle name is optional.
|
Note |
The First and Last name fields must be minimum of 1 character and a max of 64 characters. |
- Enter an Email for the new user.
|
Note |
The Email address must adhere to the following characteristics:
|
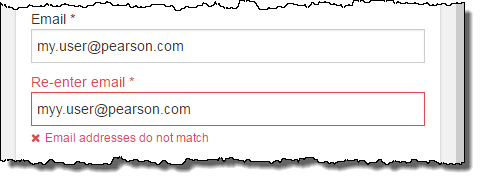
- Re-enter the email address for the new user.
- If the Username field is blank, enter a Username and click Check.
- Enter a Phone number for the new proctor (optional).
|
Note |
The Phone number can be a max of 20 characters. You may enter the phone number using dashes, periods or spaces. The phone number is an optional field. |
Enter proctor address
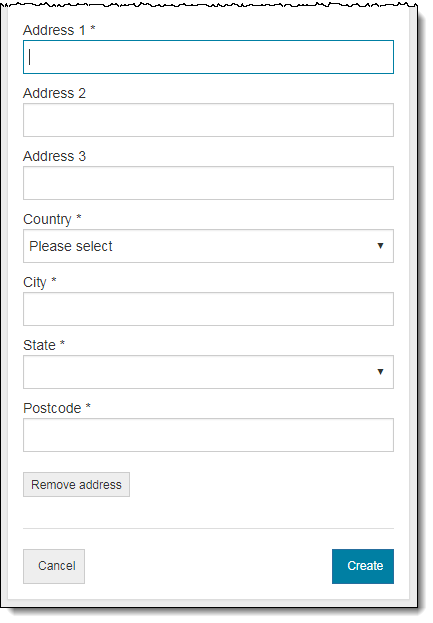
Address fields are optional for proctor accounts; but if you choose to add any address fields to the proctor account, you must add all the required address fields.
- Click Add address.
|
Note |
When you create a new proctor account, you are not required to provide the address information. If you choose to provide an address for the proctor, you must supply all of the mandatory address fields before saving the new proctor account. |
|
Note |
The mandatory fields will change depending upon the Country selected when entering address information to a proctor account. If you do not know all of the required address fields when you first create the proctor account, you will be unable to save the new proctor account to the system. You can click Remove address and add the address information at a later time. When you select Remove address, all the address fields are cleared and you are returned to the basic Create new proctor page. |
Cancel new proctor account creation
- At any time prior to saving the new proctor account, you may click the Cancel button at the bottom of the Create a new proctor page.
You are returned to the list of current proctors for the client.
Save the new proctor account
- Click Create.
If any of the required fields are not completed, an error message is displayed at the top of the screen and all required fields will be highlighted in red to indicate they must be completed prior to saving the proctor account.
Upon successful proctor account creation, a message states that a new proctor was successfully created and you are able to add exam authorizations. 

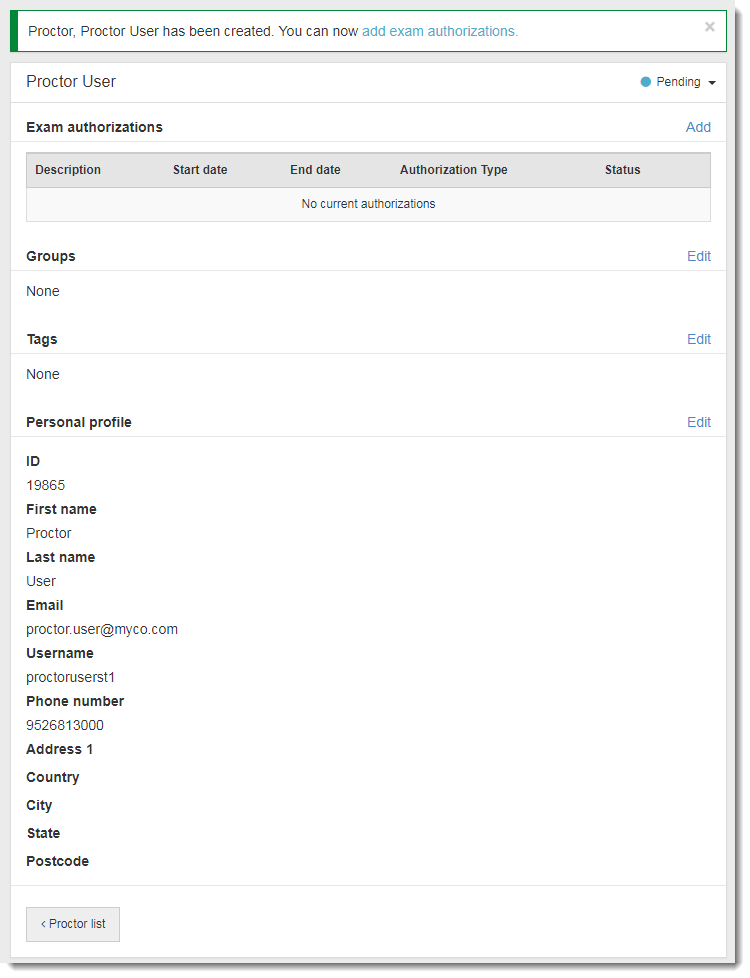
The proctor is automatically assigned the Proctoring role and given permission to use the Proctoring application.
The system generates an email and sends it to the new Navigator proctor user. The user must use the link in the email to log in to Navigator within 7 days of receiving the email. The user must configure their security questions and set their password.
- You are now ready to Add Authorizations or to close the proctor profile by clicking the Proctor list
 button.
Make an existing user a proctor
Users that have already been set up in the User Management application may be assigned the proctor permission using the Proctor Management application.
- Click the Create proctor button in the upper right-hand corner of the Search proctors page.
The Create a new proctor screen opens. 


- Enter the Username for the existing user that you wish to make a Proctor user and click Next.
The Create a new proctor page appears with the existing user information filled in. A message states an existing user was found. You may make the user a proctor or create a new proctor. 

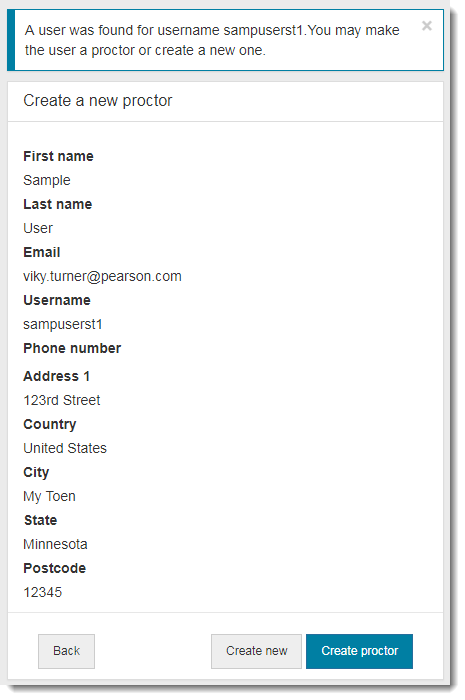
|
Note |
If the username entered is not a valid user, you will be directed to the Create proctor page with only the Username filled in. |
- Click Create Proctor.
A message states the new proctor user has been created and you can now add authorizations. 
 Follow the instructions in the Add Exam Authorizations topic for detail on adding authorizations.

The existing user is automatically assigned the Proctoring role and given permission to use the Proctoring application.
Pearson VUE Proprietary and Confidential
